PRODUCTS

REFURBISHED Baja No Pinch Mini Bike Kit
REFURBISHED Baja No Pinch Ultimate Tire Tool Kit

REFURBISHED Baja No Pinch Tire Tool

PRODUCTS


Lifetime Tool

Highest Quality
of Alluminum alloys and CNC Machining
A Must-have Tool
Light and easy to carry. Ready when you most need it.Step by Step Instructions
Step 1.
Pour some talcum powder into the tire and turn the tire to coat the inside. This will assist the inner tube to slide into place.

Step 2.
Screw the valve stem into the inner tube and inflate inner tube slightly.

Step 3.
Place the inner tube into the tire.

Step 4.
Push the valve stem through the rim hole and screw in the valve cap. This will save trying to get the valve stem in later when getting your hands under the tire bead can be a very difficult job. The No Pinch tool is a big help mounting a tire this way.

Step 5.
Starting at the rim lock, push the bottom bead over the rim and under the rim lock. Continue on pushing the tire over the rim as far as you can by hand.

Step 6.
Use the No Pinch tool to push the bottom bead over the rest of the rim. Lifting up on the bottom of the tire, to get the bottom tire bead into the center channel of the rim, makes it easier for the tire bead to slip over the rim.

Step 7.
The bottom tire bead is now nearly all the way over the rim.

Step 8.
You are half way finished! The lower tire bead is completely over the rim and the valve stem is installed.

Step 9.
With the rim lock placed at the top, start pushing the tire bead over the rim at the bottom, 180 degrees from the rim lock. You can usually get it started by using both hands or, you can use a tire iron if necessary.

Step 10.
Using the No Pinch tire tool, push the tire over the bead one or two inches on one side, and then do the same on the other side. This way you are working the tire bead over the rim, working each side equally toward the top and the rim lock.

Step 11.
IMPORTANT: It is important to stop regularly and push the section of the tire that is under the rim down into the rim channel. This shortens the distance the tire bead has to stretch to get all the way over the top of the rim and it makes the job a lot easier. See Additional Resources at bottom of page – When The Going Gets Tough

Step 12.
HAND POSITION: Pushing down on the handle and pushrod at the same time. This keeps the red bracket on the wheel hub and the pushrod pushing the bead outward over the rim. This is critical at this stage of the tire mount. See: When The Going Gets Tough at the bottom of the page.

Step 13.
In this photo the tire bead is almost all the way over the rim.

Step 14.
Push the rim lock into the rim before you push the tire bead over the rim.

Step 15.
Tire mounting complete! Don't forget to tighten the rim lock.

Step 16.
Tire & wheel back on. Ready to rip........

Additional Resources
Using the Baja NO PINCH Tire Tool - Printable Instructions
When the going gets tough - Instructions for tires that are harder to mount than normal
Click to Open
VIDEO - How to Set-up the Baja No Pinch Tool
VIDEO - Fixing a flat tire in the Baja desert using the NO Pinch tire tool
VIDEO - Baja No Pinch Tool Hot Tips
Remember, Practice makes perfect
Installing a motorcycle tire requires a certain knack or technique. With patience and a few installed tires under your belt, you will become totally competent and independent when it comes to installing your motorcycle tires.
TIPS FOR SUCCESSFULLY CHANGING TIRES
USING THE BAJA NO PINCH TIRE TOOL
Use the proper tools. You will need the following:
- Quality tire irons for tire removal
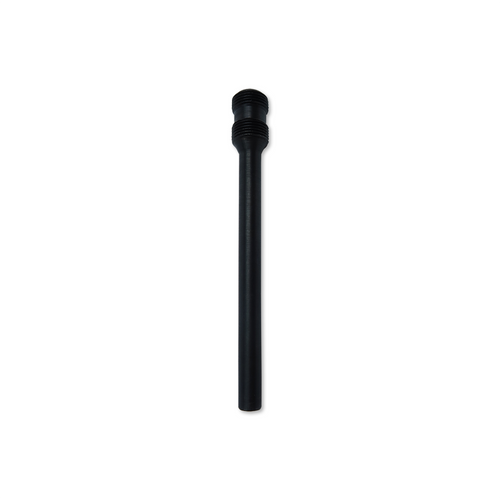
- Baja No Pinch Tool for tire installation (note: you may also require the 17mm axle shaft or 25mm sleeve depending on the axle diameter of your wheel)
- wrench for the rim lock
- valve stem tool to remove valve stem
- talcum powder
- soapy water or Windex
- tire changing stand – helpful, but not necessary
- a warm tire (cold tires are very stiff and difficult to change)
- patience and practice
Installing the tire
STEP ONE
- inflate the inner tube just enough so that it has a slightly soft, round shape
- sprinkle talcum powder inside the tire or on the inner tube (this helps the inner tube slide into place)
- place the inner tube inside the tire
- pull valve stem out from tire enough to push stem up through the valve stem hole in the rim
- screw a valve stem nut or valve cap on a few threads so stem remains outside rim hole
- tuck the inner tube all the way around inside the tire
- push bottom bead of tire up into wheel channel at the valve stem while at the same time pushing down over the rim - the bottom tire bead will now be part way over the rim
- start using the No Pinch tire tool to push the tire bead the rest of the way over the rim. Be sure that the Tool is fully inserted into the wheel axle opening. The red bracket should be touching the wheel when in use
- guide the No Pinch tool bead push rod with one hand and pull on the tool handle with the other
- keep downward pressure on the bead push rod with your hand - pushing down hard on the bead push rod will keep the tool bracket in contact with the wheel hub and will help ensure that the tool is correctly pushing outward and not downward
- With the bead push rod against the tire, pull the handle back to push the tire over the rim. Start close to the point where the tire needs to go over the rim and push the tire over the rim an inch or two at a time. After every 2 or 3 pushes do the same on the opposite side.
- stop frequently and push the tire down on the rim to get the tire bead into the rim channel -pushing down hard on the tire right behind where you are working with the No Pinch tire tool is the key (the stiffer the side wall, the more important this is)
- continue until the bottom bead of the tire is completely over the rim
- Tip – this method saves having to squeeze your hands between the tire and the rim getting the valve stem into the rim hole later – it is already done
STEP TWO
- turn the wheel 180 degrees so that the valve stem and rim lock are at the 12:00 position
- starting from the bottom (6:00 position), begin by pushing the tire under the rim - this takes a good push and on a very stiff tire you might have to start it using a tire iron
- make sure the tire bead drops all the way down into the channel in the center of the rim
- start using the No Pinch tool to push the tire over the rest of the rim. Be sure that the Tool is fully inserted into the wheel axle opening. The red bracket should be touching the wheel when in use
- guide the No Pinch tool bead push rod with one hand and pull on the tool handle with the other
- keep downward pressure on the bead push rod with your hand
- With the bead push rod against the tire, pull the handle back to push the tire over the rim. Start close to the point where the tire needs to go over the rim and push the tire over the rim an inch or two at a time. After every 2 or 3 pushes do the same on the opposite side.
- always stop after doing the above and push the tire down into the wheel center channel - pushing down hard on the tire right behind where you are working with the No Pinch tire tool is the key (the stiffer the side wall, the more important this is)
- do this from the bottom of the tire and work your way up on both sides to where the tire is still on top of the rim - this ensures that the bead is fully inside the center channel
- keep repeating while working toward the rim lock
- for very stiff side walls you can use some soapy water or Windex on the tire bead below where you are using the tool – this will give the tire a better chance of sliding into the center channel
- pushing down hard on the bead push rod will keep the tool bracket in contact with the wheel hub and will help ensure that the tool is correctly pushing outward and not downward
- make sure the rim lock is pushed up into the tire so the tire bead can slip under the rim
- tighten the rim lock
- inflate the tire while using soapy water or Windex to make sure the bead seats properly in the rim